
OSCP Course & Exam Preparation
Full disclosure I am not a penetration tester and I failed my OSCP exam twice before eventually passing on the third attempt. I owned more than 90% of boxes in the labs (including the big three) but when it came to the exam I just kept bombing out. I am hoping something I share here will prevent you from making the same mistakes.
Course Overview
Lab Time
After years of wanting to do OSCP I got lucky and my employer paid for the full 90 days lab time. This allowed me to put alot of time into the lab network and own all but 5 boxes. I was putting in 4-5 hours a day and a bit more at the weekend but because the labs are so fun it didn’t really feel like work. That’s not to say it was easy at all but the effort I was putting in was being rewarded every time I got mself another root flag.
After hearing about the Offensive Security labs for the last few years I got a bit too excited and as soon as I got my VPN access and jumped straight into the lab network without reading any of the documentation. I figured I had done a few CTF’s\Vulnhub images in the past so I was probably ready for the labs, I was wrong. After a week I had a few of the really easy boxes but found myself getting stuck alot and with no real idea of what to do next. So I stepped back and decided to take a more methodical approach which started with reading the material and trying the techniques in the lab network.
There are bonus points for writing up the Labs and the Exercises that can be used as an additional submission to your final report. I had originally planned to do this as there were 10 points up for grabs, however at some point a month or so before my lab time started Offensive Security changed the weighting of the extra submissions. What was originally:
- 5 points for writing up a lab report
- 5 points for writing up the exercises
Became 5 points for both. Whilst writing the Labs was good practice for the final Exam report and the exercises were informative it felt like it was going to be alot of extra effort and use even more of my dwindling free time to document it all correctly.
One big takeaway from the labs is to get into the habit of documenting everything you do to compromise a host it will help you so much later in the labs and exam when you come across a similar vulnerability. It also makes the final exam report a case of copying and pasting. I have included a copy of my reporting template for each host below.
The Try harder mantra is something your are going to hear a lot. There are going to be times where you are so frustrated and you just cant figure out what to do on a certain box and all the help you seem to get is Try Harder!
The act of self discovery and figuring out those steps yourself is a big boost, after smashing the keyboard for 3 days and then finally finding that missing links. It makes grabbing those flags just a little sweeter.
Exam Attempts 1, 2 & 3
The exam is tough, it requires you to score a minimum of 70 points within 24 hours and then submit a formal penetration test report in the following 24 hours.
I tried to start each exam as early in the day as I could (normally around 9am-11am). I thought this would give me the best shot of staying alive if I had to use the full 24 hours.
While working on one machine I was scanning another, I found that scanning the machines took alot longer than it did in the lab network so be prepared to switch up your scans for quicker ones.
In my first exam I worked for 10 hours owned several boxes and got 57.5 points. I knew exactly what I needed to do to get my last 12.5 from a privilege escalation but it was late and and I hadn’t taken a break longer than 5 minutes all day.
I was completely burnt out and after banging my head against the same unstable TTY shell wall for a while longer I decided to jack it in and try again in the morning. Sadly even in the morning I still couldn’t get a stable enough shell to let me finish the privilege escalation.
Second time around I had 55 points after 6 hours and felt pretty good. Then I literally spent 7 hours failing to login into a service even though I had the password all along, a massive fail. Unfortunately things didn’t get any better after that and for the next 12 hours I failed to score any more points which was pretty demoralising.
The big thing I learnt from the first two attempts was I should be taking regular breaks and listening to some music. I had intentions of doing this from the beginning but, much like Alice, I found myself getting drawn in to boxes and tunnelling down the rabbit hole. Spending hours at my desk convinced the answer was just around the corner. Learning to step away is a must.
On the third attempt I had a lot more experience to draw on. I took a 10-15 break from my screen every 3 hours, multi tasked between scans and testing techniques and within 8 hours I had 80 points, enough to pass. I tried for another couple of hours to get my last 20 point box but I couldn’t get anything out of it so retired and decided to save my energy for the report writing.
Personally I didn’t find the reporting aspect too hard, it took me around 3-4 hours total to copy/paste everything across from my workbook and proof read to make sure it made sense. To make things harder on myself I decided to make my own reporting template but their really wasn’t any need, Offensive Security provide a template which is perfect.
36 hours or so after my third attempt I finally got the email I had be waiting for saying I had successfully passed my OSCP.
Useful Tools
CherryTree
The biggest piece of advice I can give is to anyone about to take OSCP is to replace KeepNote with CherryTree immediately. Unlike KeepNote CherryTree is still actively maintained, allows subnodes, code boxes and pretty much everything else you need. I use it as my primary note keeping tool for everything now.
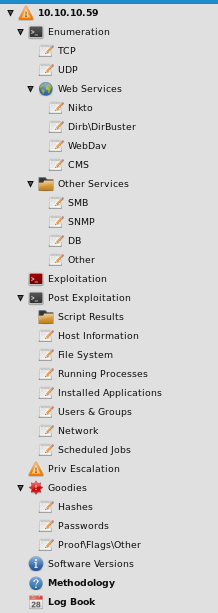
In order to make it easier for myself to retroactively look things up and report on my findings I created a CherryTree template which I imported for each host I worked on. Its all pretty self explanatory, I just copied and pasted the output from the relevant tools into the appropriate node. I also kept a running log book of everything I was trying so if I took a break I could pick it up again without repeating any actions.
It’s worth making your own but you can get a copy of my template file from here.
Termininator
Replace the default Kali terminal with Terminator. Terminator is multi window terminal which allows infinite scrollback, console search and all that good stuff.
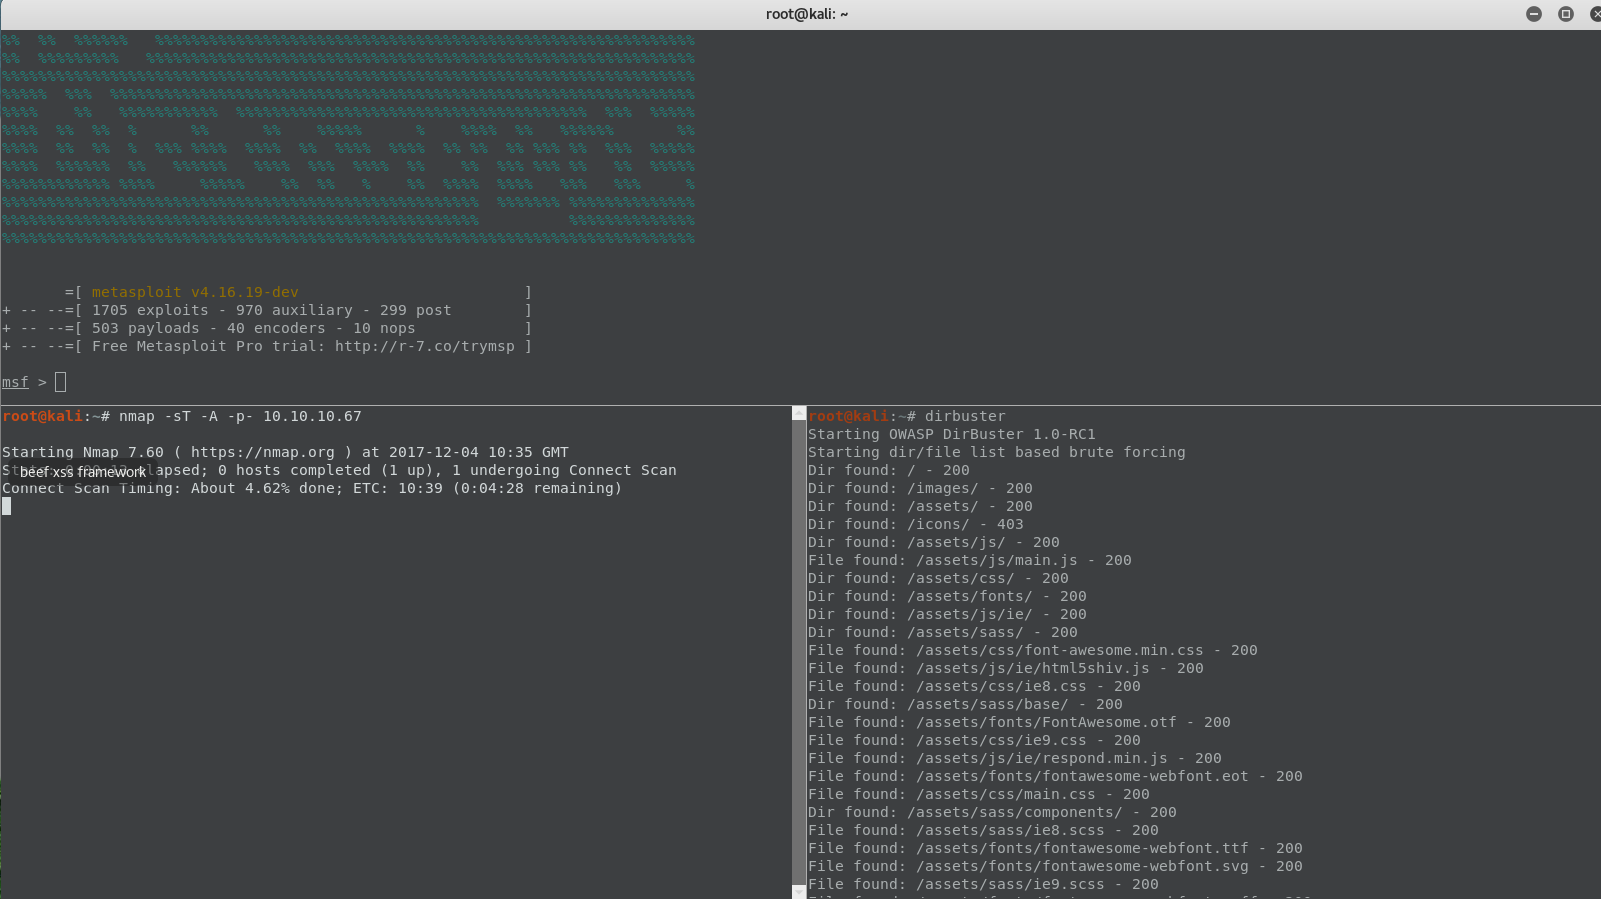
I found it so much easier working on a box and having all the scans running from a single window. Also the infinite scrollback saved me a few times. There are extra pluings you can find that allow google search from highlighted code, save sessions to text file and more. Just google them.
JAWS
JAWS is PowerShell script I designed to help penetration testers quickly gather host information and identify potential privilege escalation vectors on Windows systems. It is written using PowerShell 2.0 and as such ‘should’ run on every Windows version since Windows 7. This is a tool that I wrote after my time in the OSCP labs but did use in my exams with some success. You can read more about it here.
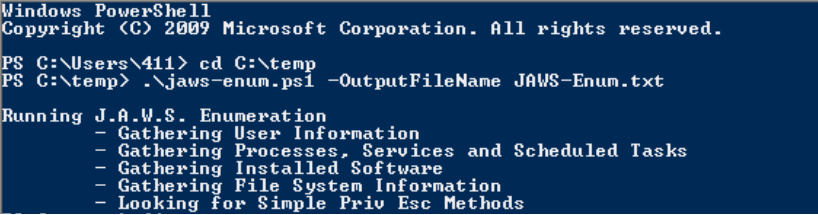
It won’t simply tell you how to escalate on a host but it will save you alot of time in host enumeration and may provide a clue for priv esc.
Linux-Enum-Mod
Same principal as JAWS (actually what JAWS was based on) it allows quick Linux host enumeration and has run on every version of nix I have tried it on. This is a slightly modified version of highon.coffee’s awesome Linux enumeration script to which KevtheHermit has added a few extra checks.
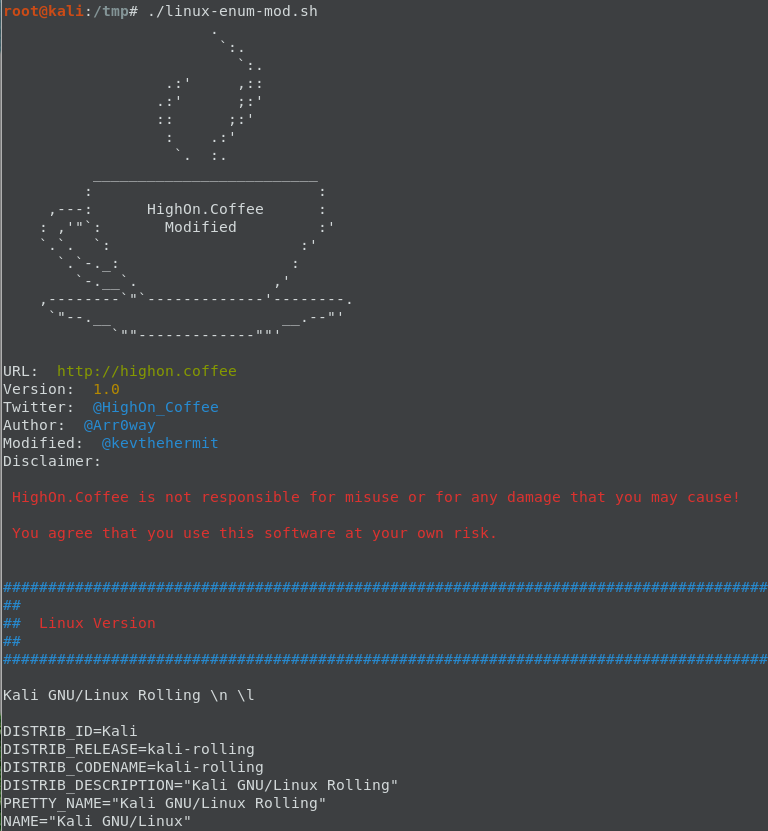
You can download it from here.
Windows Exploit Lookup Doc
Many times in the OSCP labs you will find yourself on a Windows host trying to determine exactly what local exploit might allow you to escalate privileges. To save Googling time I would recommended creating a local exploit spreadsheet with all the details and keeping local copies of all the working exploits you create, you will need them again. I have added a list of places you can get some precompiled versions to the Useful Links section of this post.
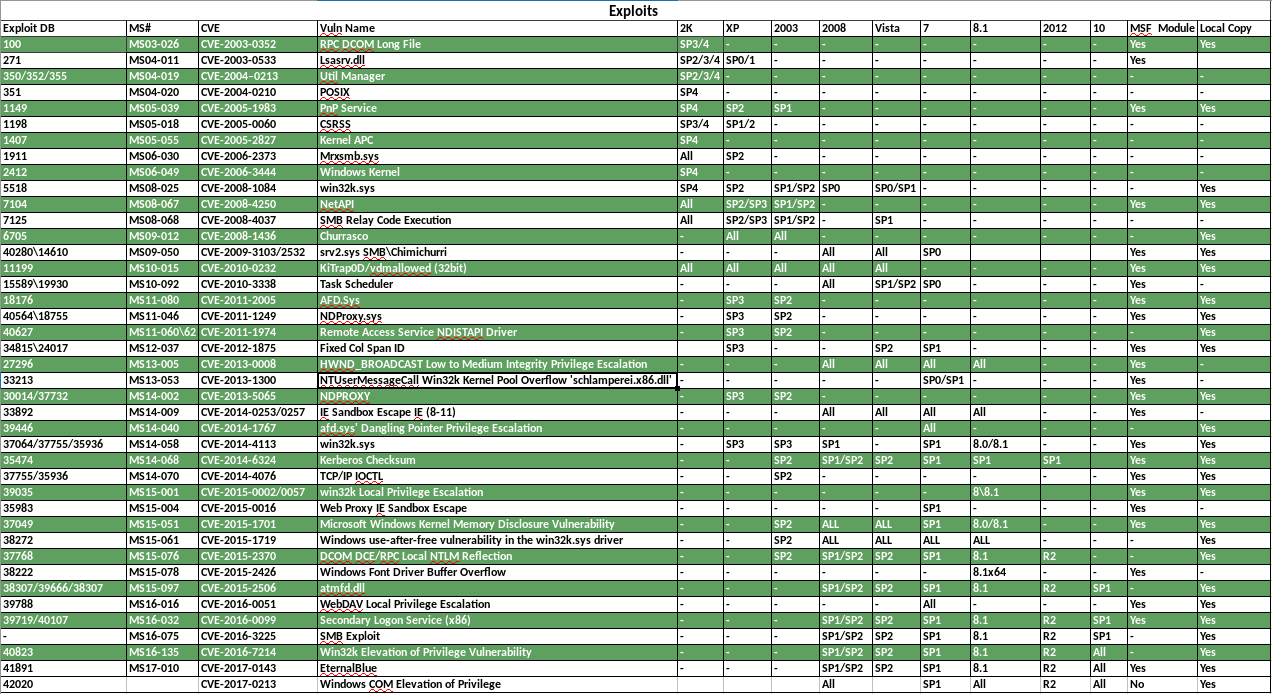
Mines a little out of date now but you can see it above and get the general idea.
Useful Links\Resources
Finally this is just a list of blogs, posts, gits etc that I found to be useful, this isn’t my full list just what I have to hand atm.
Precompiled Windows Exploits
Privilege Escalation
- g0tmi1k Linux Priv Esc
- FuzzySecurity Windows Privi Esc Fundamentas
- Windows Privilege Escalation Methods for Pentesters
- Common Windows Privilege Escalation Vectors
Generic\Useful
- Spawning a TTY Shell
- Upgrading simple shells to fully interactive TTYs
- Converting Metasploit Module to Stand Alone